 Since this is what we see when we look out our back door,
 we made some of these today.
 An oldie, but a goodie and they are an instant perk me up.


 Since this is what we see when we look out our back door, we made some of these today. An oldie, but a goodie and they are an instant perk me up.

 This morning as I was reading through my favorite blogs I came across this picture over at Valerie's Family Frugal Fun Blog along with a post about how happy it makes her to know that families are coming together and having fun by using her ideas.
 I started first with some leaf garland wrapped around the wreath and was then going to add the fabric but, I quickly decided that was not the direction I wanted to go. Off came the garland.
 I used mostly used scraps I had around but, I did pick up a few fat quarters from Walmart and of course, the clearance fabric bin. I always look there.
 I was thinking about buying one of those ceramic hands that you put your rings on to hold my earrings, odd I know, but I don't ever take my rings off and I have a few pairs of hoops that I always wear. Anyway, I found this little treasure and now it sits on my vanity and it holds not just my earrings. The little glass container was also a thrift find. I am a sucker for little glass jars.
 I was so happy to find this guy.
 And now it hangs in my bathroom.
 Nice tall vase wrapped in jute.
 Spray painted white.
 And this voluptuous lady. Reminiscent of the 80's mod phase. I swear everything was mauve. Both Ryan's and my parents had this color carpet in their houses and not in a little girl's room.
  And it was only 80 cents.
 I spray painted her black. Add some twigs that Johnsie and I cut from trees in our yard and then I added some little white paper flowers. I need to make more of the flowers when I get a chance. The mirror was also a thrift find. She was gold before I painted her.
 These are my next project.
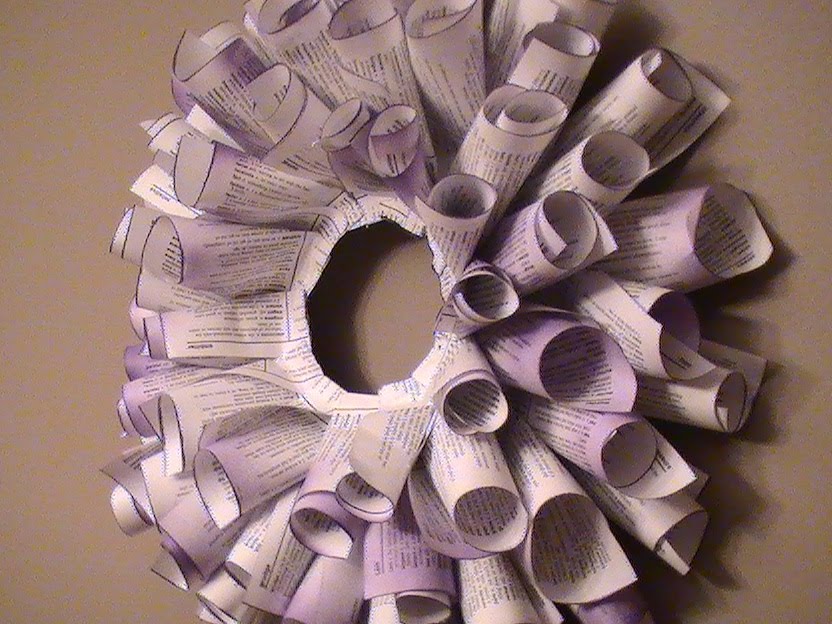 Anyway, I spray painted the edges purple and also fanned the book out so some of the interior pages were painted.
 Next, since I didn't want mine very large I just cut out the center of a paper plate and then continued in the way Lindsey describes. First, I glued paper rolls to the back of the plate and then I flipped the plate over and started filling in the front.
 I just purchased some really cheap canvas' and covered them with burlap. Next, I spent forever cutting out leaves with my rotary tool. I folded the fabric over a few times so, that I wasn't cutting out one leaf at a time. I used mod podge to adhere the leaves and trunk.


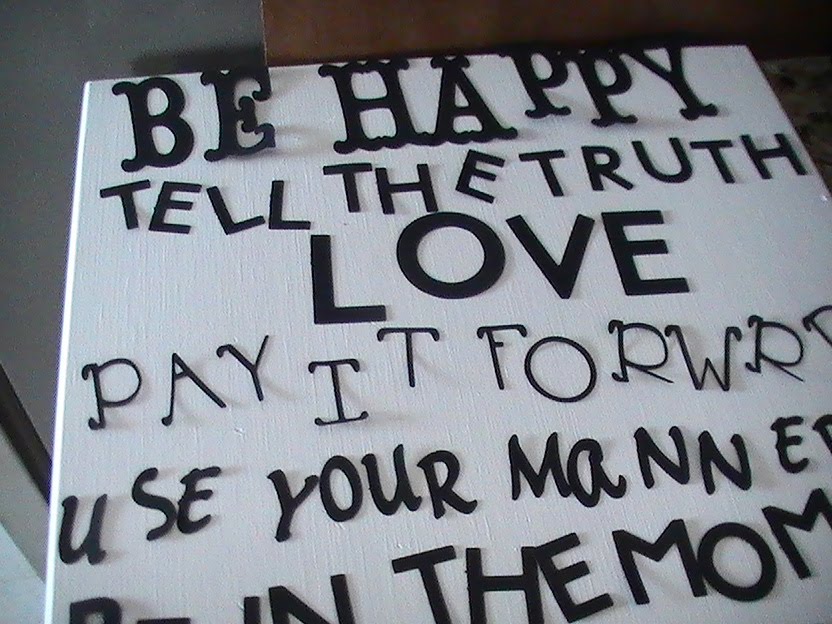 I made a list of all of the rules I wanted and I got out my handy dandy cricut and cut away. Some of the rules did get cut out a couple of times because I made them too long. Glad I had a whole new stack of black cardstock next to me.
 Then I just eyeballed the rules to center them. I wasn't going for perfection. No levels or rulers were used in this process. Mod podge was, however, used in this process. I took each letter and covered the back with my good ole mod podge and when I was all done I covered the whole thing with a layer too.
 Here it is hanging in my kitchen for all to see and FOLLOW. I did try to use rules that were positive. I thought about, "chewing with your mouth closed" (Chickie!!). She would actually leave the table during dinner when her brother was eating too loud. Just you wait lady.
 I bought 2 J's and almost all the letters for Johnsie's name.
 For the J, I covered it with some jute and extra cording that I trimmed off our bamboo shades. Resourceful, huh? I knew I could use those cords for something.
 Here it is up on a shelf next to Johnsie's ultrasound picture.
 And here it is nestled in a plant. Not sure where it will end up.
 Here the boys are painting Johnie's name. Green, of course.


 Then I just covered up the area with jute. Voila. I added some twine to a few of the other letters so, the R didn't look out of place.
 I bought this cork board from the thrift store for 99 cents. It is a big one, 24" x 36". I painted the frame and distressed it a little. Covered it with some fabric I already had by using staples and then I glued on some ribbon.
 I am hoping this helps us to run like a well oiled machine. Or at least one that isn't in a dire need of an lube job.
 The other day we went to our local Sam's Club, 40 mins away, and picked up this lovely box of dog treats. 14 pounds worth of yummy goodness was in this box.
 Our dilemma was, where do we keep this large box of delectables?
 Well, we just happened to have a 5 gallon bucket that we sometimes dump dog food in. So, I got to thinking, I am going to make that sucker cute and store our treats in it.
 I got out some spray paint, (make sure you use the stuff for plastics) and sprayed the lid and the top of the bucket.
 Mod podged some scrapbook paper onto it.
 Printed out a little sign, of course, my cricut is still in storage.
 And filled her up.
  I bought these blocks forever ago at a thrift store back in MN. They are made from chunks of a 2x4. The letters are a part of the wood, they are not just glued on. So, I think they were made by at home by someone who had one of those cool saws that can engrave. Ok, I sound like a boob, because I have no clue what kind of saw it is but, we just were watching a commercial on DIY where someone made a monogrammed fireplace mantel using one. -Hope they never plan on moving or plan to sell to someone with the same last initial-
 Honestly, I think they probably said SANTA and the T got lost in Timbuktu.
 Anyway, I took the little buggers outside and gave them a fresh coat of black spray paint.
 This rock has been getting a lot of use lately.
 After that, I cut a piece of thin cardboard the same size of the blocks. And then, because I am so
  Ok, so earlier today, I went to the craft store and bought a whole bunch of these black letters. What I want to do is make removable fronts for the blocks that I can change out each month. I figured I would just velcro the cardboard onto the blocks.
 I do need some help with coming up with words for a few months though. Or more creative words for the ones I already have. So, please give me any ideas you might have. They can be 3 letter words too.


